

Are you a developer who wants to deploy your applications to the cloud quickly and easily, without worrying about infrastructure management, scaling, or maintenance? If so, "Render" may be the solution you're looking for.
PermalinkIntroduction: Why Deploying a Node.js Server on Render is a Good option for you .
Render deployment is an excellent choice for developers who want to get their applications up and running in no time. Render provides you various features and you don't have to worry about :
1. Infrastructure management,
2. Scaling and maintenance
It's the perfect solution for solo developers, startups, and larger projects alike, as it provides a seamless deployment experience that allows you to focus on building and improving your product.
PermalinkWhy is deployment on Render easy ?
Render's user-friendly interface makes it easy to deploy your Node.js server. You can deploy your application from a variety of sources, including Git repositories, Docker containers, and static sites. Once you've deployed your application, Render takes care of everything else, including managing the infrastructure, scaling, and security.
Isn't it super cool and easy that you can directly run your application on cloud using render .
PermalinkPrerequisites: What You Need to Have Before Starting
Before deploying our application on render we need to make sure we're logged into render to access it's dashboard .
Once we're logged in we can connect our GitHub account and list our repository for which we need to select services offered by render .
Once you have these prerequisites in place, you're ready to start deploying your Node.js application on Render. With these tools and knowledge in hand, you'll be able to deploy your application quickly and easily , and take advantage of all the benefits Render has to offer.
PermalinkFinal step : Deploying Node js application on Render .
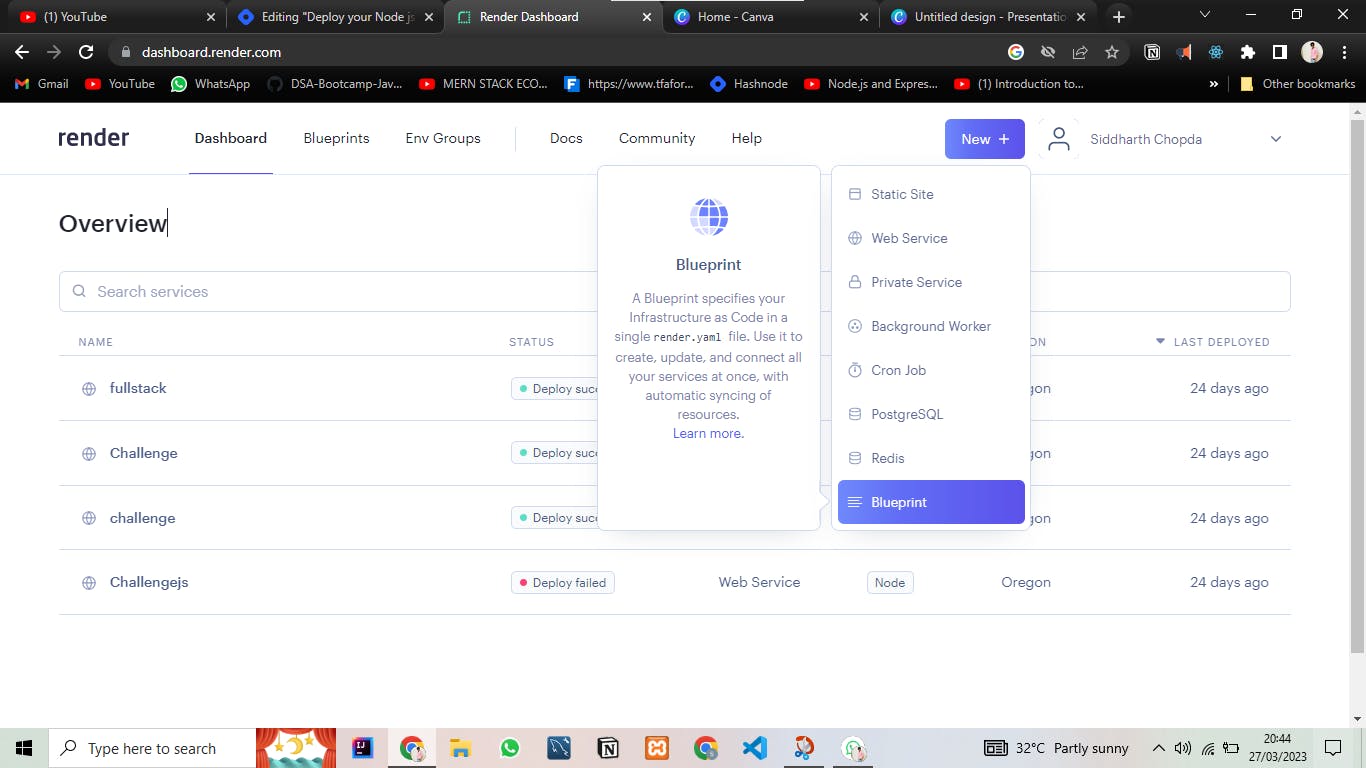
Click on New button to create a new project and then Select "Web Service "
After you have selected "Web service" , this will take you to the next page where you have to choose a repository , which you want to choose for your web service.
Make sure that , the repository that you are trying to build runs fine on your local machine . Otherwise you can see errors while deploying your web service.
Click on "connect" to proceed , after which you will be redirected to the next page.
You would be asked to fill in the following details :
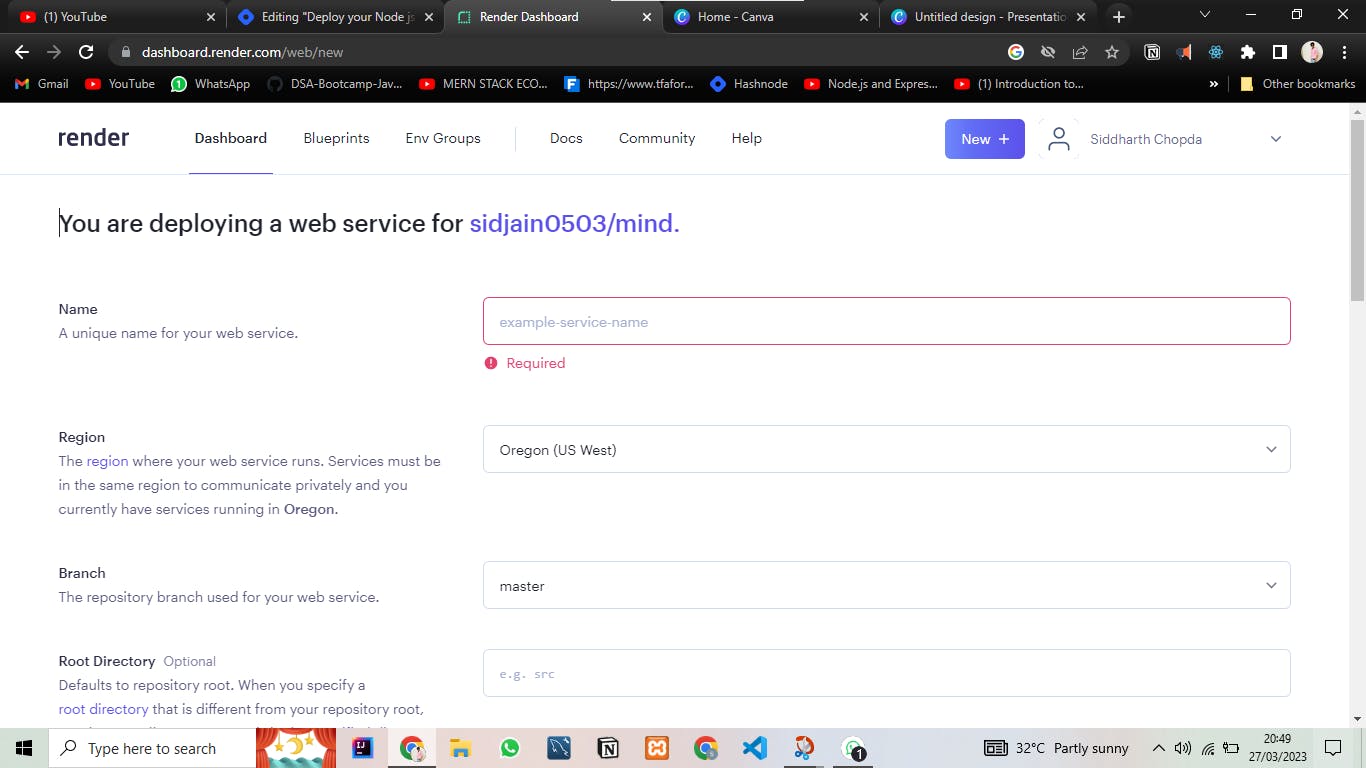
Name of the project , Choose anything which is suitable as this would be included in the url when deployment would be done .
Branch name : Select the branch on which your upto date application is present .
Root file name : Here, mention the file where the application is running . Genrally in node applications it's "Index.js"
Build Command : You can use yarn or npm as per your preference .
I have used "npm build" , You can copy paste the below command
npm buildStart Command : Write the command that starts your application .
You can copy paste the below command .
npm run start
Choose the instance type according to your need and then Click on "create" to finish your deployment .
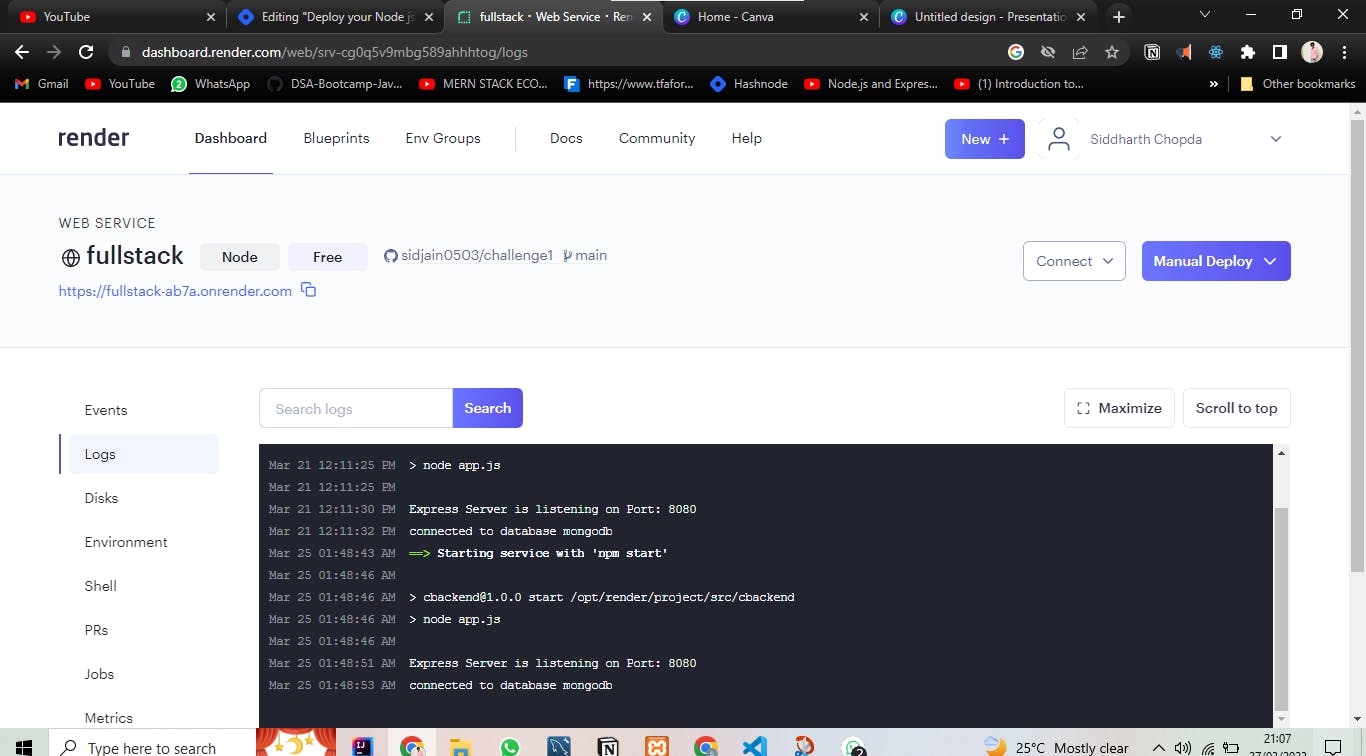
Now you have succesfully deployed your Node js application on cloud using render
The Link on the top left side of the screen is the deployed link which you can be used to access your application from the cloud .
PermalinkConclusion
Render offers automatic scaling, easy deployment, built-in security, and cost-effectiveness, making it an attractive option for you to deploy your Node.js applications quickly and easily.